Tutorial Step 1 - A Basic Webhook
In the first step of the tutorial, we're going to create an event handler (webhook) which is compatible with Adobe I/O Events. This webhook doesn't actually do much; it just logs the body of the request. But it provides a skeleton on which you'll build in later steps.
Dependencies
To write the webhook, this tutorial uses Express, a minimal web framework for Node.js. To automate the parsing of JSON requests, the body-parser package is used. Finally, a package named dotenv is used to parse and load the .env file created in the Overview. To install these three packages, run
Copied to your clipboardnpm install express body-parser dotenv
Writing the Webhook Script
Now you're ready to write the webhook script itself. Create a new file named index.js and open it in your IDE.
The webhook script itself has four main parts. The first part is including the dependencies, loading the .env file, and setting up the Express application:
Copied to your clipboardconst express = require("express");const bodyParser = require("body-parser");require("dotenv").config();const app = express();app.use(bodyParser.json());
The second and third parts are the Express routes. These are JavaScript functions that handle specific request patterns. An Adobe I/O webhook must handle two different types of requests.
- It must handle GET requests with a
challengequery string parameter by responding with thechallengeparameter. - It must handle POST requests by responding with a 200 status code. This is how the actual events will be received.
For the purpose of this tutorial, the path /webhook is used. This can be any path, even just /, but the same path must be used for both the GET and POST routes.
The challenge handler looks like this:
Copied to your clipboardapp.get('/webhook', (req, res) => {if (req.query['challenge']) {res.set('Content-Type', 'text/plain')res.send(req.query['challenge'])} else {console.log('No challenge')res.status(400)res.end()}})
For the POST handler, at this point in the tutorial, it should just log the body and then write something trivial as a response.
Copied to your clipboardapp.post('/webhook', (req, res) => {console.log(req.body)res.set('Content-Type', 'text/plain')res.send('pong')})
The last part of the script is to start listening for requests. Here, the PORT variable specified in the .env file is used.
Copied to your clipboardconst listener = app.listen(process.env.PORT, () => {console.log(`Your app is listening on port ${listener.address().port}`);});
Running the Webhook Script
You have at least two options to run the webhook script. The first way is to simply run it locally with
Copied to your clipboardnode index.js
You should see a message that it is up and running:
Copied to your clipboardYour app is listening on port 4000
Creating a Tunnel with ngrok
In order to use the webhook with Adobe I/O, it must be accessible to the public internet. But, your development machine is probably not accessible. So you need to open a tunnel allowing public access to the webhook. One popular tool for doing this is ngrok. Follow the instructions on the ngrok website to install it. Once it is installed, you can open up a tunnel by running
Copied to your clipboardngrok http 4000
If you changed the PORT variable in the .env file to something else, adjust the command to suit.
Once running ngrok will show you two forwarding addresses:
Copied to your clipboardForwarding http://e639e8fd.ngrok.io -> localhost:4000Forwarding https://e639e8fd.ngrok.io -> localhost:4000
For the purpose of this tutorial, the free ngrok service is acceptable. Just keep in mind that every time you restart ngrok you will get a new URL.
Running the Webhook Script with Glitch
Alternatively, you can run the webhook script using Glitch. Glitch is an interactive web-based code editor for Node.js applications with built-in hosting. To save you the trouble of copy and pasting the files you've created already, you can just click the button below to create a new application on Glitch pre-populated with the content of the tutorial so far.
In the new Glitch project, you will need to populate the .env file and create the .data/private.key file as describe in the introduction.
Feel free to create an account with Glitch if you want to continue to use it in subsequent steps of the tutorial.
Registering the Webhook with Adobe I/O
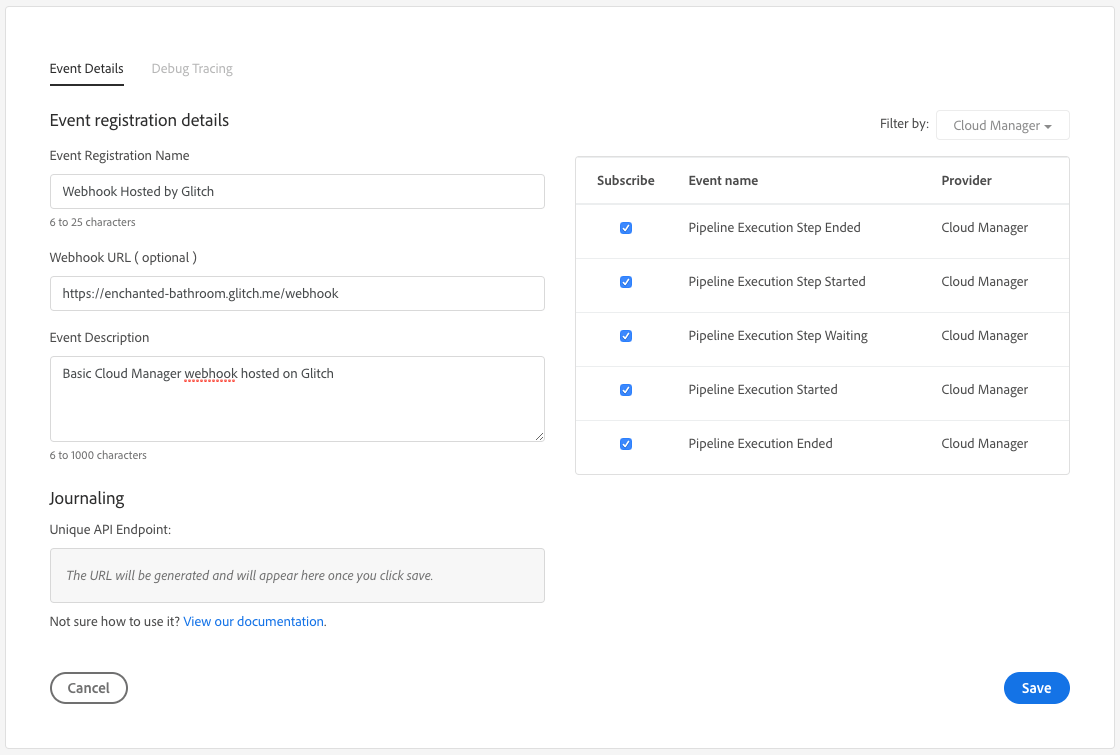
Now that you have your webhook running at a publicly accessible URL, you can register it with Adobe I/O. To do this, open the Adobe Developer Console and open the Project you created in Step 0. Click Add to Project and select Event. Select Cloud Manager and click Next.

Select the events you want to subscribe to. For the purpose of this tutorial, you will need at least the Pipeline Execution Started event. Click the Next button.
There are three options for receiving events: Journaling, Webhooks, and Runtime actions. For the purpose of this tutorial, select the Webhook option.
If you are using ngrok, the Webhook URL will be the Forwarding address appended with /webhook, e.g. https://e639e8fd.ngrok.io/webhook. If you are using Glitch, the URL will be the Glitch application name appended with .glitch.me/webhook, e.g. https://enchanted-bathroom.glitch.me/webhook

Ensure that the Single Delivery style is selected. The tutorial code is not intended to be used with the Batch style, although you may want to explore this on your own.
Next Step
With all that done, you're ready to proceed to the next step. Continue to Step 2.
