Building your first plugin
This tutorial will walk you through the process of building your first plugin. You will learn how to create a plugin, add a command to it, and then run it in InDesign.
Prerequisites
Before you start, make sure you have the following software installed on your machine:
- InDesign 2023 (v18.5) or later (can be installed from the Creative Cloud Desktop app)
- UXP Developer Tool v1.9 (can be installed from the Creative Cloud Desktop app)
- A code editor of your choice (for example, Visual Studio Code)
Steps
Step 1: Create a plugin
You can create your plugin directly in the UXP Developer Tool. To do so, open the UXP Developer Tool and click Create Plugin.
This opens a dialog where you can enter the details for your plugin:
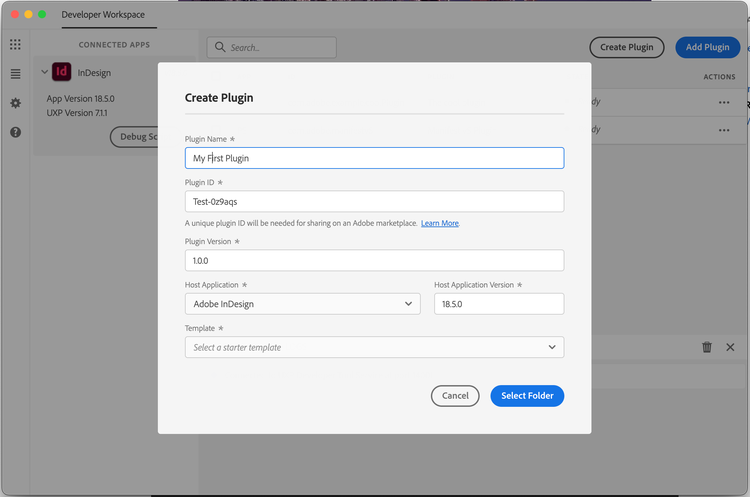
In the dialog, enter the following information:
Then click Select Folder and choose a location on your machine where you want to create the plugin.
The UXP Developer Tool will create a new folder with the name you specified in the location you specified. The folder will contain the following files:
My First Plugin
├── manifest.json
├── index.html
└── index.js
Step 2: Run the plugin
Now that you have created your plugin, you can run it in InDesign.
First things first, you'll need to run InDesign. You can verify that UDT is connected to the app by checking the connected apps panel.
Then, in the UXP Developer Tool, in the row for your plugin, click ⋯ → Load:
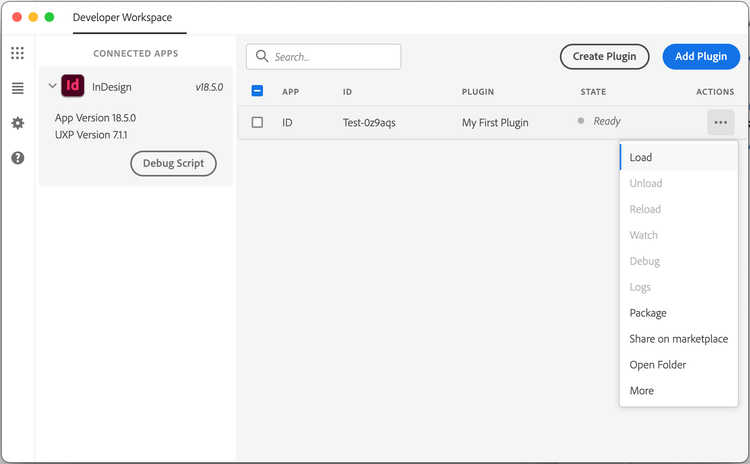
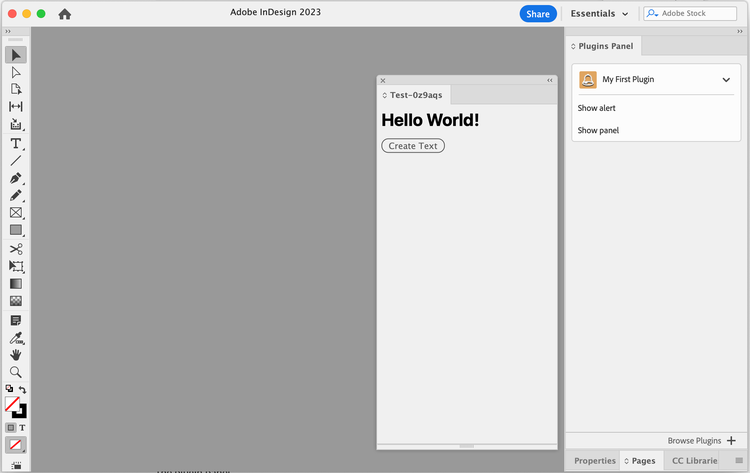
This will load your plugin into InDesign. You should see the plugin's panel appear in InDesign:
Step 3: Make a change
Now that you have your plugin running in InDesign, let's make this plugin your own.
Open the index.html file in your code editor. You should see the following code:
<html>
  <head>
    <script src="./index.js"></script>
  </head>
  <body>
    <h1>Hello World!</h1>
    <button id="btnCreateText">Create Text</button>
  </body>
</html>
This is the HTML code that defines the content of your plugin's panel. You can change it to whatever you want.
For example, you could change the heading to say "My First Plugin":
<h1>My First Plugin</h1>
Or you could add a paragraph below the heading:
<p>This is my first plugin.</p>
To see your changes, you'll need to reload the plugin in InDesign. To do so, in the UXP Developer Tool, in the row for your plugin, click ⋯ → Reload:
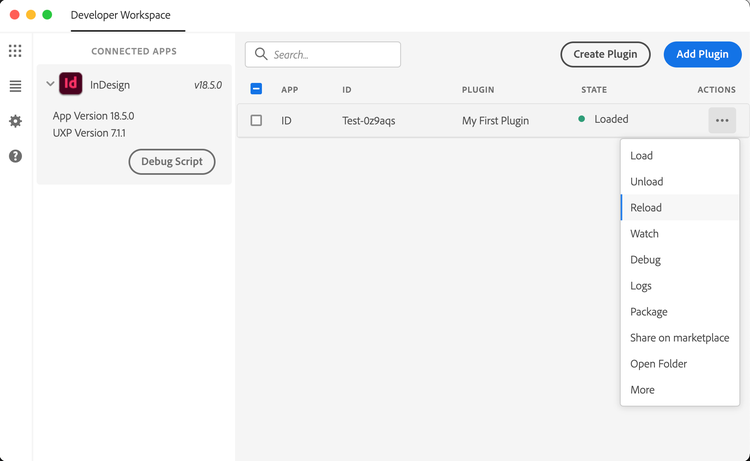
data-slots=text
manifest.json file, you'll need to fully unload and reload the plugin. To do so, in the UXP Developer Tool, in the row for your plugin, click ⋯ → Unload and ⋯ → Load:Next steps
Congratulations! You have successfully created your first plugin. Next, we'll take a look at some of the concepts that are important for plugin development.